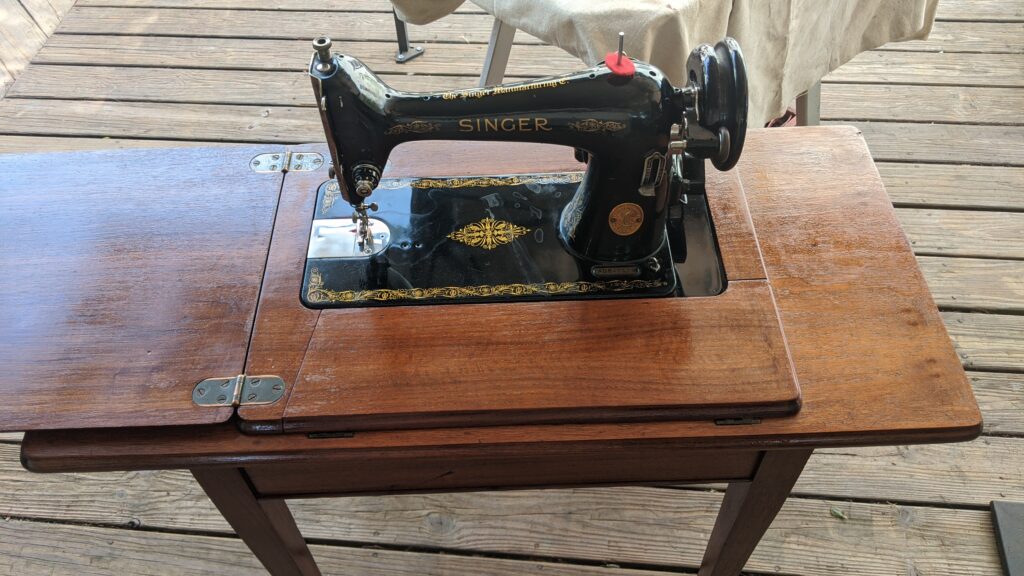
Here are a few pictures of a Singer 66-1 from 1917 I recently finished for a customer in Atlanta, GA. When she arrived, her mechanism was a sticky mess of old oil turned to varnish. Even her exterior bright work was covered in years of sticky old oil. Her mechanism was so gummed up, it was almost impossible to turn the balance wheel!
She arrived on a Tuesday, and by Sunday night she was stitching and looking great! She lives in a treadle cabinet when she’s home, but here, she went into a base and I attached a motor for her test stitching.
In addition to her clean, polish, adjust, and lubrication level service, I converted her from a back clamping presser foot to a side clamping so her owner can use commonly available low shank accessories. Also, she was made prior to Singer using a needle bar clamp with timing marks and an integrated timing gauge. I swapped out the needle bar clamp with one from a Singer 201 and added the gauge so as to make future adjustments much easier for her next major service, in another 104 years from now!
If you’re going to go bold, you might as well GO BOLD! My tractor paint experiment is finished, though as I type this only three of the four parts for the video have been published on YouTube. I’ll give it this, it’s bright. Not exactly “see it from space” bright, but you could probably pick it out from 20,000 feet with a Norden bombsight.
So, color aside, how does she stitch? Don’t be silly, she’s a Singer 66, she makes a beautiful stitch, and will continue to do so for at least another 106 years doing the same, beautiful work.
I’ve been asked “How much”? Well, I’m not sure if I’m going to sell her just yet. She has to stay here for a while, I need to know if she’s going to grow on me. I wish the decals popped against the red a bit more, maybe the red needs to be a darker shade for the gold to have a greater impact. I just may have to paint another one…
For the second time in my life, I pulled the trigger and bought myself a brand spankin’ new sewing machine. Not any old machine, but a Sailrite Leatherwork sewing machine.
If you’re familiar with the Sailrite line of machines, you’ll know that the LS-1 and LSZ-1 are beefy, walking foot class 15 machines in the same basic form factor as a vintage Singer. Instead of 15X1 needles, they are set up to use 135X16 and 17, but use a standard class 15 “1 o’clock” bobbin case. The bobbin case pretty much limits them to a maximum of V-92 thread, but that’s perfectly fine with me.
I was originally considering a Juki DU 1181N, and they are great machines, but went with the Sailrite for several reasons, not the least of is actual factory support for parts if required. Another factor was footprint; our sewing room serves also as my home office space, and the full sized industrial tables required for the 1181N is just too large for our available space. The width under the arm is less for the Sailrite than the Juki, but that’s not a big deal either, so the smaller size should work out just fine. Last, but not least; the servo motor on the Sailrite is geared down for greater power and slower speed, which is something I can 100% get behind. I don’t want, nor need a high speed machine, but the additional power from the gear reduction will be a welcome feature.
In the end, the price tag was about the same as the Juki, maybe just a little less. The Leatherwork is set up initially as a leather machine (duh) so I spent a tidy sum of money on the other available feed dogs and walking feet. I could have just bought an LS-1, but then I’d have had to buy a table to use it with a servo motor, so this turned out to be the best deal. I’ll post more about it when it arrives and we get a few projects under our belt.
Stay tuned…
PS – The first brand new machine I bought was a Toyota Super Jeans J-34. While I don’t use it, I keep it around to remind me that I dislike lightweight, plastic sewing machines…
The make over of the Singer 66 from 1915 that I painted in International Harvester Red continues! I spent some time today applying decals from www.singerdecals.com, and I don’t mind saying so, she’s looking mighty good! There’s a quickie, 53 second video over on my YouTube channel showing the progress. I couldn’t be happier with how it’s coming along.
The question thus arises: Do I recommend painting sewing machines in tractor paint? Well, I’ll let you know after I paint a machine John Deere Green and Yellow…
I bought a sewing machine. Actually, that day I bought three, but who’s counting.
Anyway, the machine I want to talk about was a Singer 66-16 from 1941. It was filthy, the cabinet was a vile mass of mold and mildew, but I instinctively knew there was a superb machine under the dirt and schmoo.
I was right, but I had no idea what can of worms I had opened.
As found, Singer 66-16
The wiring was shot
I’d say on a scale of 1 to 10, this dirt and schmoo is an 11
Her list of flaws was pretty long. Besides the obvious cosmetic issues, she suffered from wiring that had completely deteriorated. She was also locked up, and locked up pretty bad too. Normally, I can free up a 66 or 99 pretty quickly, but not this time, this one was going to need some parts!
The first rule of fixing sewing machines (and most things mechanical) is DON’T FORCE ANYTHING! Find out WHY something is stuck using proper diagnostic procedures, then fix the issue. Well, someone in this machines past didn’t follow that rule and broke parts – important parts. I tried moving the handwheel and heard a distinctive clank. Taking off the cover on the needle bar end, I saw what I was up against and started disassembling the machine. Whomever it was that forced the handwheel had snapped the needle bar!
The broken remains of the needle bar and bushing
In case you don’t recognize the parts in the photo above, the part of the left is the needle bar bushing with the snapped off needle bar still inside. The part of the right is what’s left of the needle bar along with the clamp that holds it to the connecting rod. The needle bar was rusted solidly in the bushing.
So… What to do? I went to eBay and looked at the listings of my favorite supplier of sewing machine parts, and sure enough, he had both parts I needed. One problem… They were from different eras of Model 66. The needle bar he had was from the correct sub-variant, the 66-16. The bushing he had was from a 66-1 Red Eye from 1920. I ordered both, hoping they would fit.
They didn’t. They bushing from the Red Eye was oh so ever so slightly too small. I don’t have the proper machine tools to precisely bore out a hardened steel bushing, so I had to drop back 20 yards and punt. Luckily, I had saved the old parts. The next step was to attempt to salvage the original bushing.
2 hours and a lot of creative profanity later (Note: I’m tri-lingual, English, Sarcasm, and Profanity). the “new” needle bar was moving smoothly in the original bushing. The extraction process involved Aero-Kroil penetrating oil, and the judicious application of punches and hammer against the old needle bar. The bushing was actually in really good condition. There was minimal rust holding the needle bar in place, it was more crud than rust. Had the 200 pound gorilla that tried to force it just let it be, I would have had her freed up with no damage in very short order.
Once we knew the machine was going to be just fine, Liz stepped up to the plate and started tackling the cabinet.
Liz sanding the cabinetry…
She spent hours sanding, scraping, and stripping what was left of the finish from the cabinet. She also used a lot of A-1 Kerosene killing and cleaning off the mold and mildew. Once that was accomplished, the carcass was stained and new lacquer was applied. Liz did a great job on the cabinet, and I never even asked her to help, she just wanted to be a part of the rebirth of a classic.
There is still a lot of finishing work to be done, but we just wanted to see the machine in the cabinet for the first time…
Looking MUCH better
Once we did the initial test fit, we were both super motivated to see the project through to the end. Once it was finished, Liz commented that it was one of the nicest stitching machines she had ever used. I have to agree, it is a superb machine.
As much as I love that 66, we didn’t “need” it, and honestly, we have so many 66’s that it wouldn’t have seen any use. Machines in cases are easy to store, machines in cabinets… Not so much! She needed a new home. Enter Michele…
Michele is a long time friend, and she was in the market for a classic Singer. “Have I got a deal for you!” The deal was sealed before she even sat down at the machine. I had posted pix and videos on Facebook and Michele was sold. We loaded up the Singer in Liz’s Rogue and made the delivery.
Michele is one happy girl with her classic Singer 66.
I think the smile on Michele’s face says it all… A good friend gets a good machine, that’s a win-win in my book.
Oh yes… I mentioned that on that day, I bought three machines, this 66, a 15-88, and a 201-2. Michele has the 66, my sister Sue has the 15-88, and my daughter in law Sara has the 201-2. All went to good homes!
I love just about anything old and mechanical, old sewing machines, old motorcycles, old cars, old tractors, anything where I can get my hands so dirty, I have to use hot water, Dawn dish soap, and a scrub brush to get my hands clean.
I used to own a tractor, a 1956 John Deere 420U with a Henry front end loader. I wanted a Farmall, but they were pretty scarce where I was living at the time, and the few that were in the area were way out of my price range. The JD 420 didn’t have working brakes (drop the bucket to stop), her tires were horrible, she leaked a fair amount of oil, and with a steering wheel that was perfectly vertical, she required a LOT of strength to steer – especially if there was a load in the bucket. She was a little cantankerous to start when she was cold, but a quick shot of starting fluid spray into the carburetor got her going without too much trouble.
When she was new, her 2 cylinder engine was rated at a whopping 27HP. I’m not even going to go into the laundry list of other problems that old tractor had. Suffice it to say, in spite of her flaws, I really loved that machine. Why? Probably because we had an understanding. Yes, she talked to me. She let me know in no uncertain terms when she needed more hydraulic oil, she told me when she wanted her ignition points cleaned, and when her spark plugs were starting to foul. In return, as long as I took care of her needs, wants, and desires, we got along very, very well. What I couldn’t do, was afford to REALLY get her back into top form. When I had that tractor, money was tight, and it simply wasn’t meant to be.
I mention that old tractor because I have a Singer model 66 from 1915 that kind of reminds me of her. She’s a bit butt ugly, and needs a lot of attention to get her running in top form. The difference is, I now have the time and skills to change the future of the 66, something I couldn’t do for the John Deere.
Sewing machines talk to me too. Spend enough time with one, and you know by the sound how they are doing, such as whether they want a drop of oil. They talk to you and let you know they don’t like a particular brand of thread, or type of needle.
Now the 66 is naked, stripped of every part, every screw, every bolt. Everything is being brought to better than factory condition. Her paint and decals though, they were beyond saving. So, in honor of old tractors everywhere, I decided to not only repaint the 66, I would repaint her in homage to one of my favorite tractors, the Farmall D-430. I went to the local Tractor Supply Store and bought some Majic brand Tractor, Truck & Implement Enamel in International Harvester Red.
After stripping her down to bare metal, giving her some Rust-Oleum self etching primer, followed by more sanding, I started spraying color! Some may call it blasphemous, but I don’t care, I’m digging on the 66 in International Harvester Red, I have to wait two weeks for the paint to fully cure before I can add the decals and spray the matching Majic brand clear coat. To be honest, the suspense is killing me. I really don’t need yet another model 66, and this being an early one without back tack or reverse, it won’t ever be my go-to machine, but I also know that when she’s done, I won’t ever sell her.
Pictures to follow when she’s finally going back together.
But someone has to do it. Recently, I posted a series of videos on YouTube on the Singer 192K. One of the videos in that series shows the cleaning process I go through when performing a full clean, lube, adjust service. It is a filthy process, but the end result is the inside of the machine looks absolutely beautiful. Aside from looks, getting rid of that old oil (which turns to varnish) not only makes the machine look great, it will run better for longer too. The action of the needle and the feed dogs naturally produce a lot of lint, which ends up inside your machine. By getting rid of the crud, it’s easier for you, the owner and user, to perform 1st echelon maintenance, thus reducing the number of trips your machine takes to the shop. We are always willing to spend time with the owners of the machines we service to explain all of the user maintenance procedures that they can do which will make their machines run consistently and reliably.