It’s a cliche, I get it, but it’s also true; we live in an increasingly smaller world.
I had a phone call today from a woman named Brenda who said she was given my business card by an employee at the local JOANN Fabrics and Crafts store. She said she was a beginner and was having pretty bad tension issues and couldn’t seem to get anything to work correctly. I asked what machine she had and what class bobbin it uses. Brenda told me that it’s a Singer Simple, and uses Class 15 bobbins. She also said she’s had it for about 6 months.
Now I’m not a snob or anything, but I just don’t work on those cheap, disposable plastic Singers. I should also say up front, all of my initial contacts are house calls, if the machine needs to come to the shop, I will transport it, both ways. My service call fee can easily exceed the cost of one of these disposable future inhabitants of the landfill, but my curiosity was piqued, I had to see just how bad this thing was. I grabbed my Towa TM-2 Class 15 Bobbin Case Tension Gauge and my field kit, and headed out the door for the 22 mile trip to Brenda’s house…
Now before someone calls me out as a rip off artist, going on a call for a machine that clearly isn’t financially viable, I had zero intention of charging Brenda for the call, regardless if I could resolve her issues or not.
When I got there, Brenda showed me the mess she was dealing with, and yes, she had tension issues, BIG issues. I started out by unthreading everything and rethreading her bobbin case and testing tension. It should be about 200mN on the gauge, this one was showing less than 30. I got that squared away (or so I thought) and threaded up the machine.
The first line sewn looked pretty good, but not great. I did a second line without making any changes and it was horrible! Upper and lower tensions didn’t hold at all. I opened the bobbin compartment to remove the bobbin case and as I grasped the lever on the case the retaining ring, hook, bobbin case – EVERYTHING came spilling out onto the table. It was a complete piece of junk. The latches wouldn’t even hold the retaining ring securely.
At that point, I told Brenda I wasn’t going to charge her to “repair” this thing. I was brutally honest, the “Simple” was simply a piece of junk and I’d rather put her in a quality machine where I could give a meaningful parts/labor guarantee. I asked Brenda what kind of projects she wanted to sew, and we both came to the conclusion that, at least for now, a simple straight stitch machine would do the job. I offered to go pick up one of my freshly serviced Model 99’s if she wanted. I even offered a “try before you buy” and a stellar deal, and she agreed.
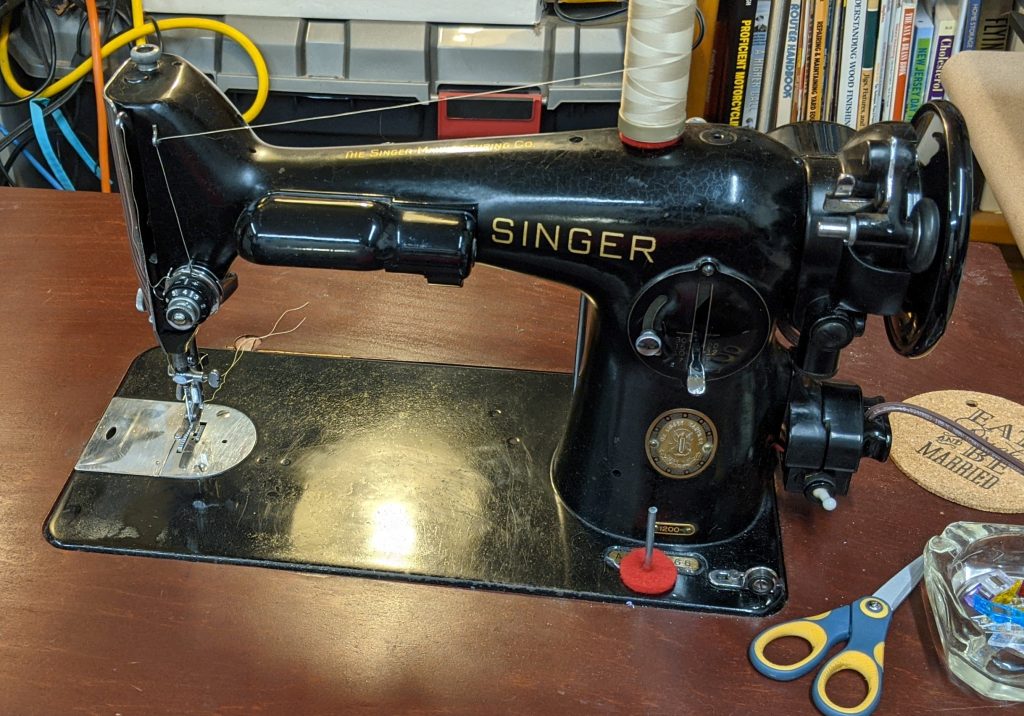
I drove home, did a quick test on a Singer Model 99 from 1929 that I had in a base (no case top), installed a new Alphasew .9 amp motor with an electronic foot controller, grabbed a half dozen new metal bobbins, a new needle oiler, and of course, one of my business coffee mugs and headed out the door.
Upon my return to Brenda’s house, I set up the 99 in her sewing room. The machine was already threaded and ready to plug in and go. I sat her down and told her to give it a spin.
The look on Brenda’s face was one of amazement! After the first line of stitches, I had her flip the work over and every stitch was absolutely perfect. Hey, it’s a 99, they’re bullet proof perfection, of course it looked great!
So there we are, Brenda is happily sewing away, testing the machine, and I ask her what she does for a living. She tells me and we compare day jobs. When she finds out that I work in video teleconferencing by day, she mentions that her father does too! “Yes, he worked at BlahBlahTel”. “OMG! I work at BlahBlahTEL! What’s your Dad’s name?” “Warren” was her response…
It was then that I found out that her Dad sat 3 cubicles away from me… FOR THE PAST EIGHT YEARS! Granted, we didn’t always work complete shifts together (I went back and forth between the US, APAC, and EU shift hours), but we spent a significant amount of time working together – he in Tech Services, and me in Operations.
So… It was only WELL after she had tried the machine that I found out she was my friend’s daughter. That did change the terms of the deal, to say the least! The “Friends and Family” discount immediately came into play.
No regrets here, the mission is to not only save vintage machines, but to make sure sewists – especially new sewists – have machines they will love to use instead of machines they swear at. To be able to help the daughter of a friend is sometimes the icing on the cake.
Well… What was it that got me out of the house to go look at a $79 piece of junk? I don’t like to be a condescending jerk and say to someone “It’s not worth my time”, though I really would have been justified in doing so. I guess sometimes, there’s a little gravitational tug that changes our course forever, at least it changed the course for Brenda. The universe does work in strange ways…
As a postscript… I gave Brenda my email address and told her to send me a message and I would email her a pdf of the manual for the machine, as well as some helpful links. When she emailed me, she told me she told her Dad what happened!
Note: “BlahBlahTel” is obviously fictional. To avoid any legal issues with the real BlahBlahTel, I won’t disclose the actual name of the company. Not here anyway, and not until I retire…